¶ Users
TecCom Portal allows us to add and manage users for our TecOrganization, and also to customize the access for each of them.
For login issues, please visit: Known Login Issues.
To access user management choose Admistration > Users in the navigation menu. This menu item is available only if you have administrator role in the organization that is selected and displayed beside your user name in the upper, right corner.
In the TecCom Portal two different user roles are offered:
- User
- Administrator
Depending on the role assigned, the user has role-specific default permissions. For example, menu items are displayed or certain features are permitted depending on the role of the user. Additionally for User role the permissions can be customized per organization.
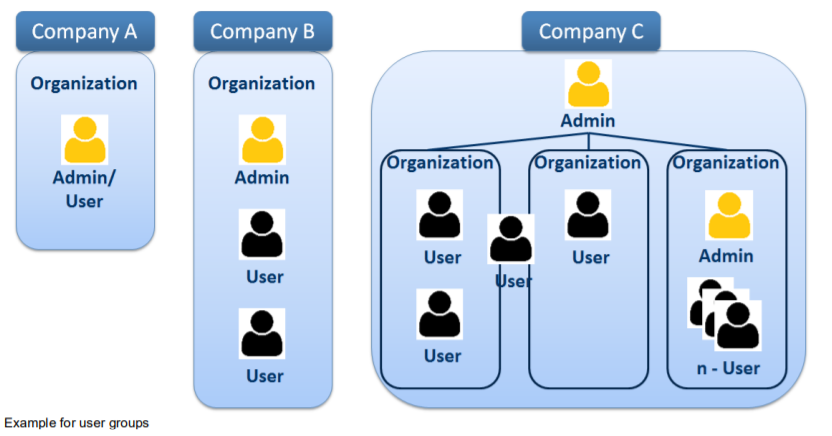
You can adapt the TecCom Portal to your corporate structure by freely deciding on the allocation of users and administrators in the organizations. Different constellations can be mapped. For each organization, a separate TecCom ID is required.
In the User management view an administrator can:
- view a list of all users belonging to your organization
- view and modify user profile
- administer user roles and permissions
- add a new user to your organization
- add multiple users to your organization by importing user list from a csv file
- remove a user from an organization
¶ List of users
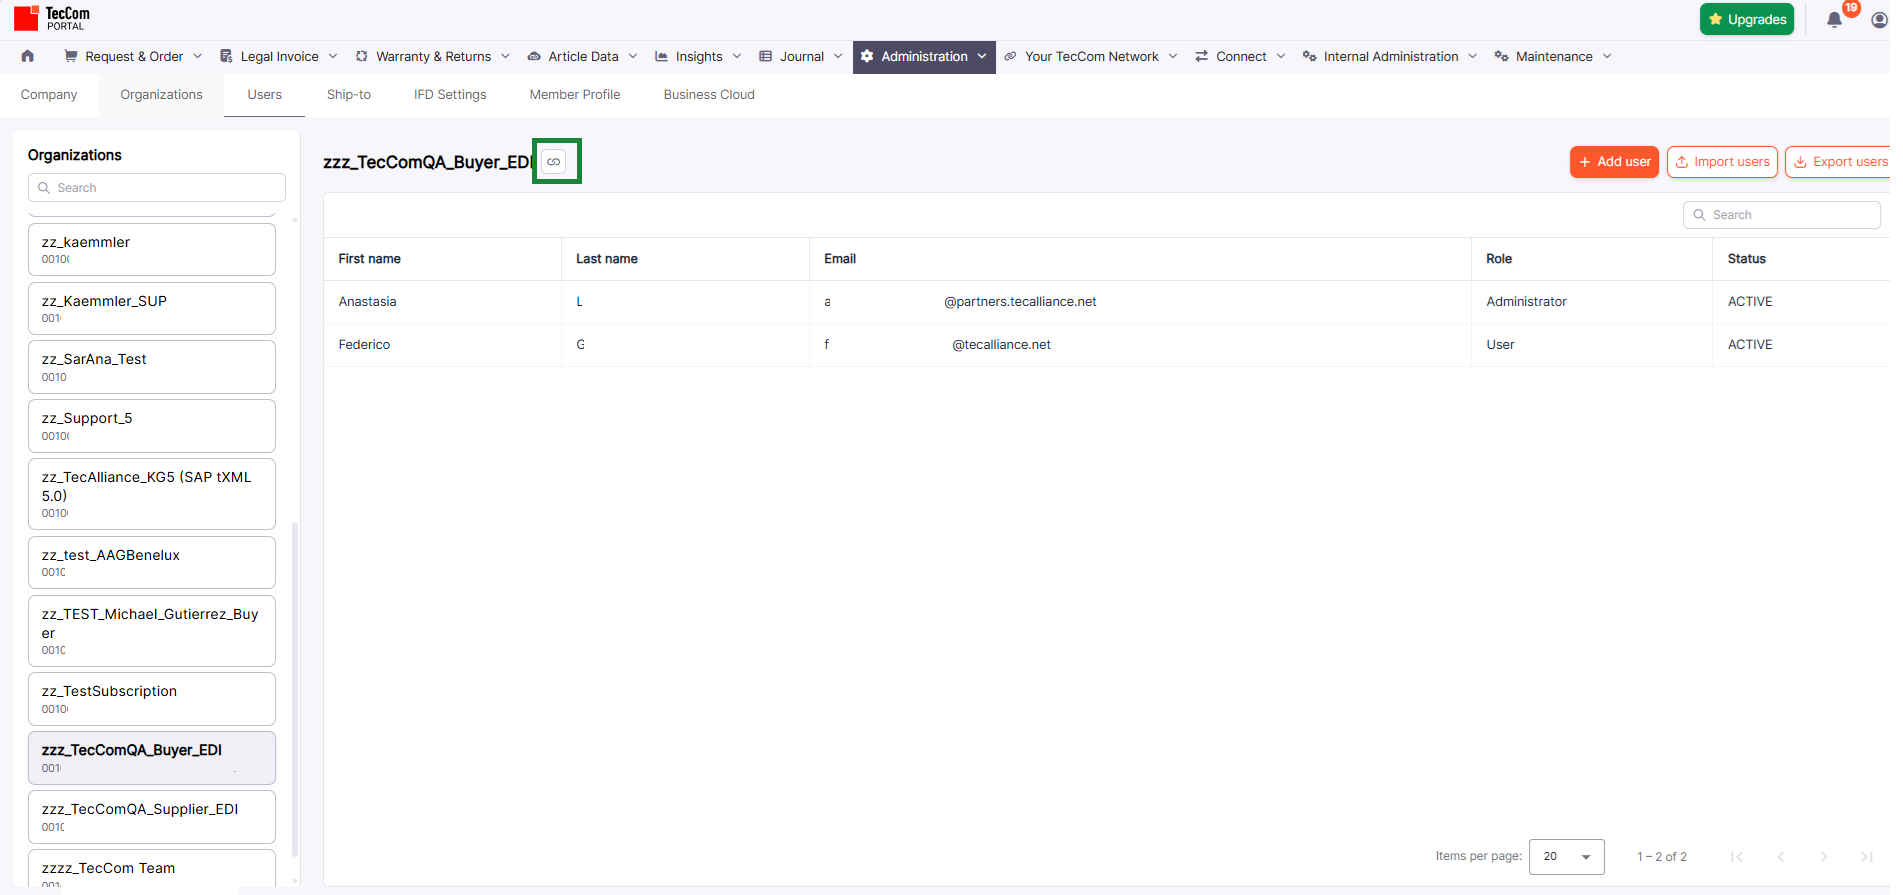
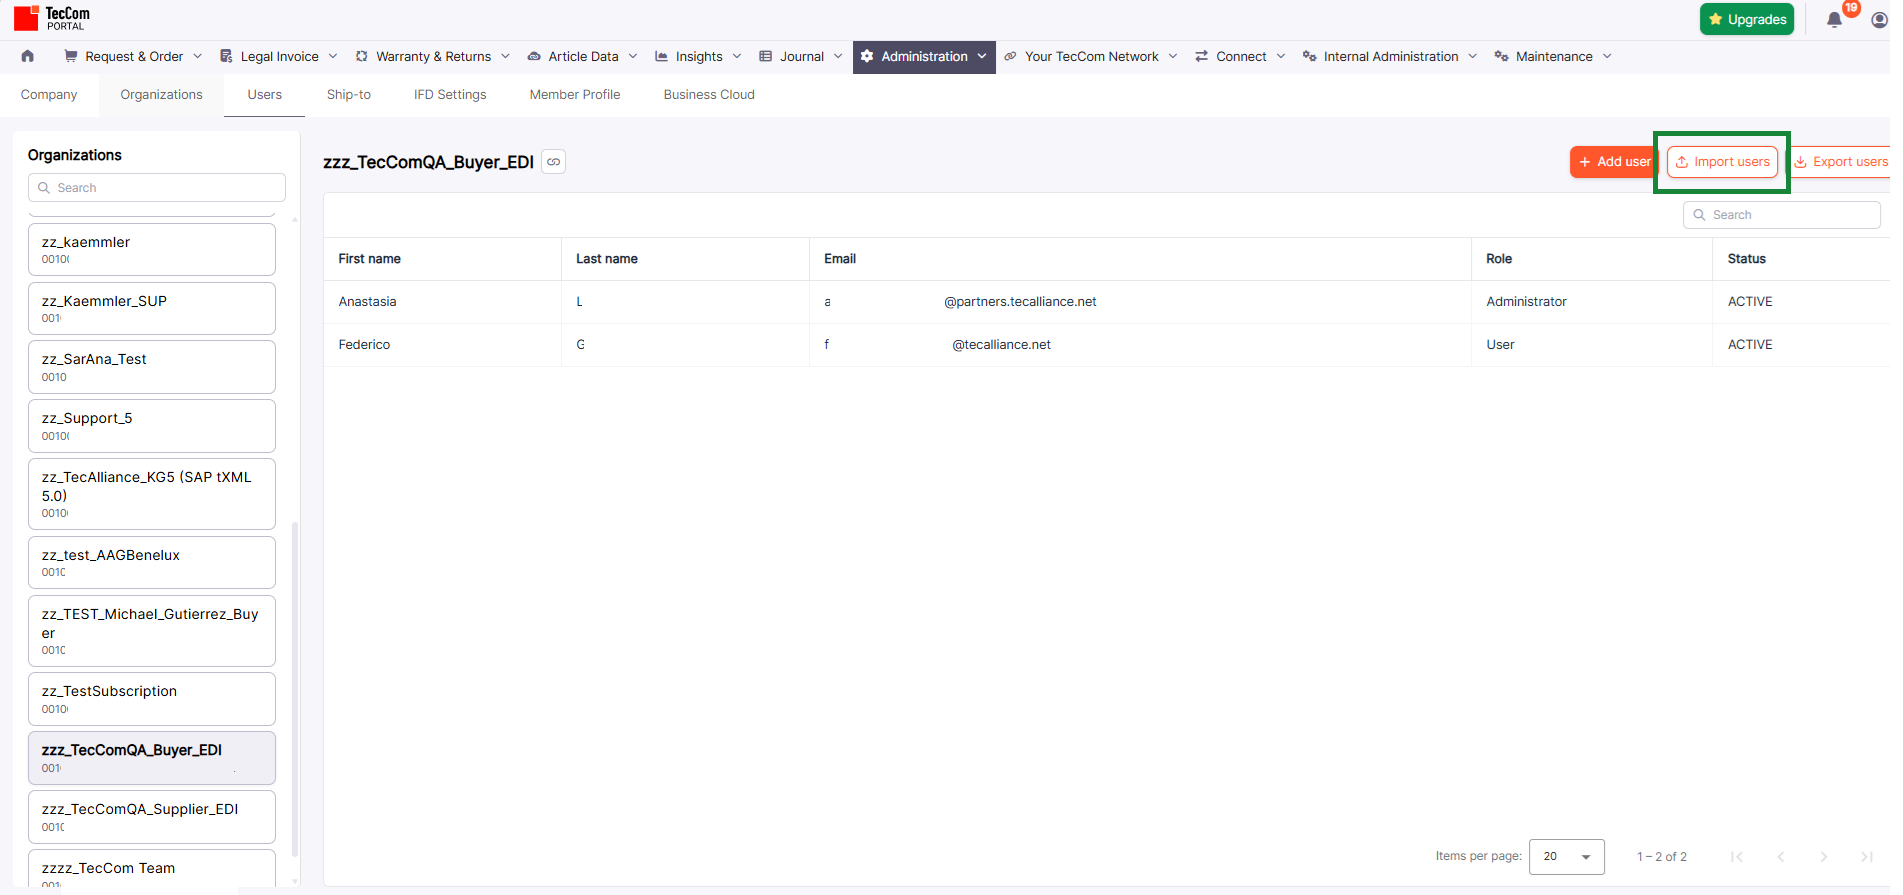
The Users page provides an overview of users assigned to a selected organization.
The organization list is displayed on the left side of the page. It contains organizations where you have an administrator role. You can use the search field to find the required organization. After you select an organization, the table on the right side displays users assigned to this organization.

The selected organization name is shown above the table. The link icon next to the organization name allows you to open the organization details page.
The user list includes the user’s first name, last name, email address, role, and account status. User roles can be Administrator or User.
To find a specific user within the selected organization, use the search field above the table. The search works by first name, last name, and email address.
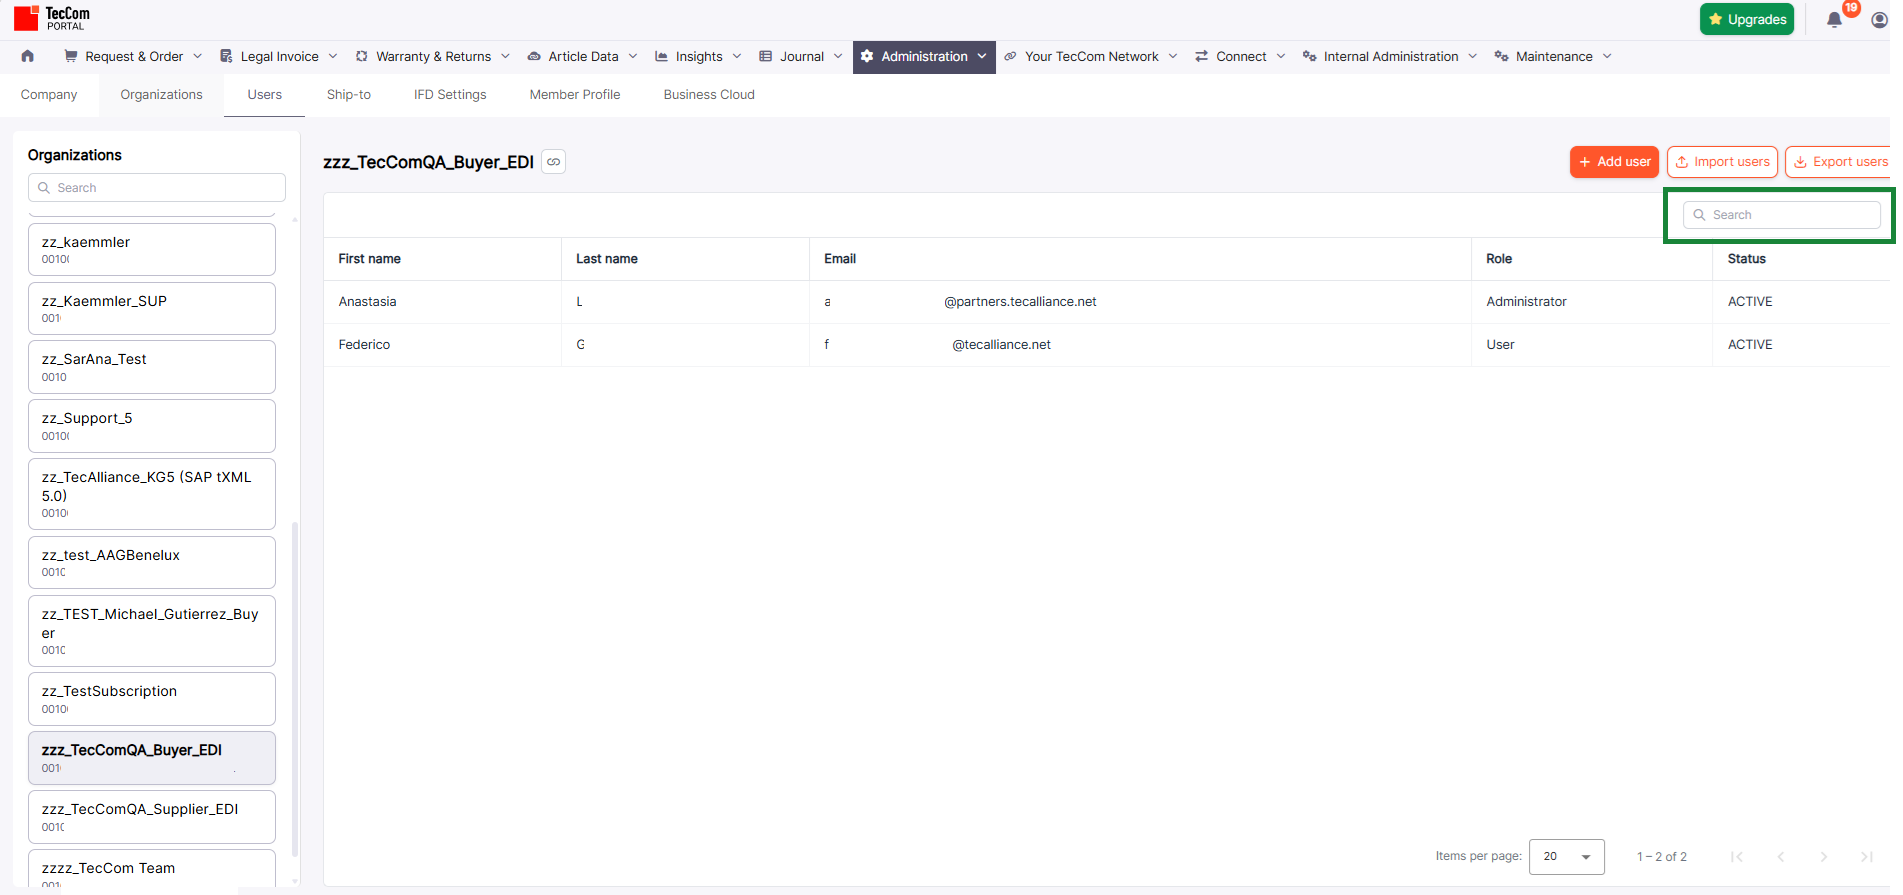
The table can be sorted by column values. To sort the list, hover over a column header and click the sorting icon.
¶ Add a new user
Administrators can add new users to organizations where they have an administrator role.
To add a new user:
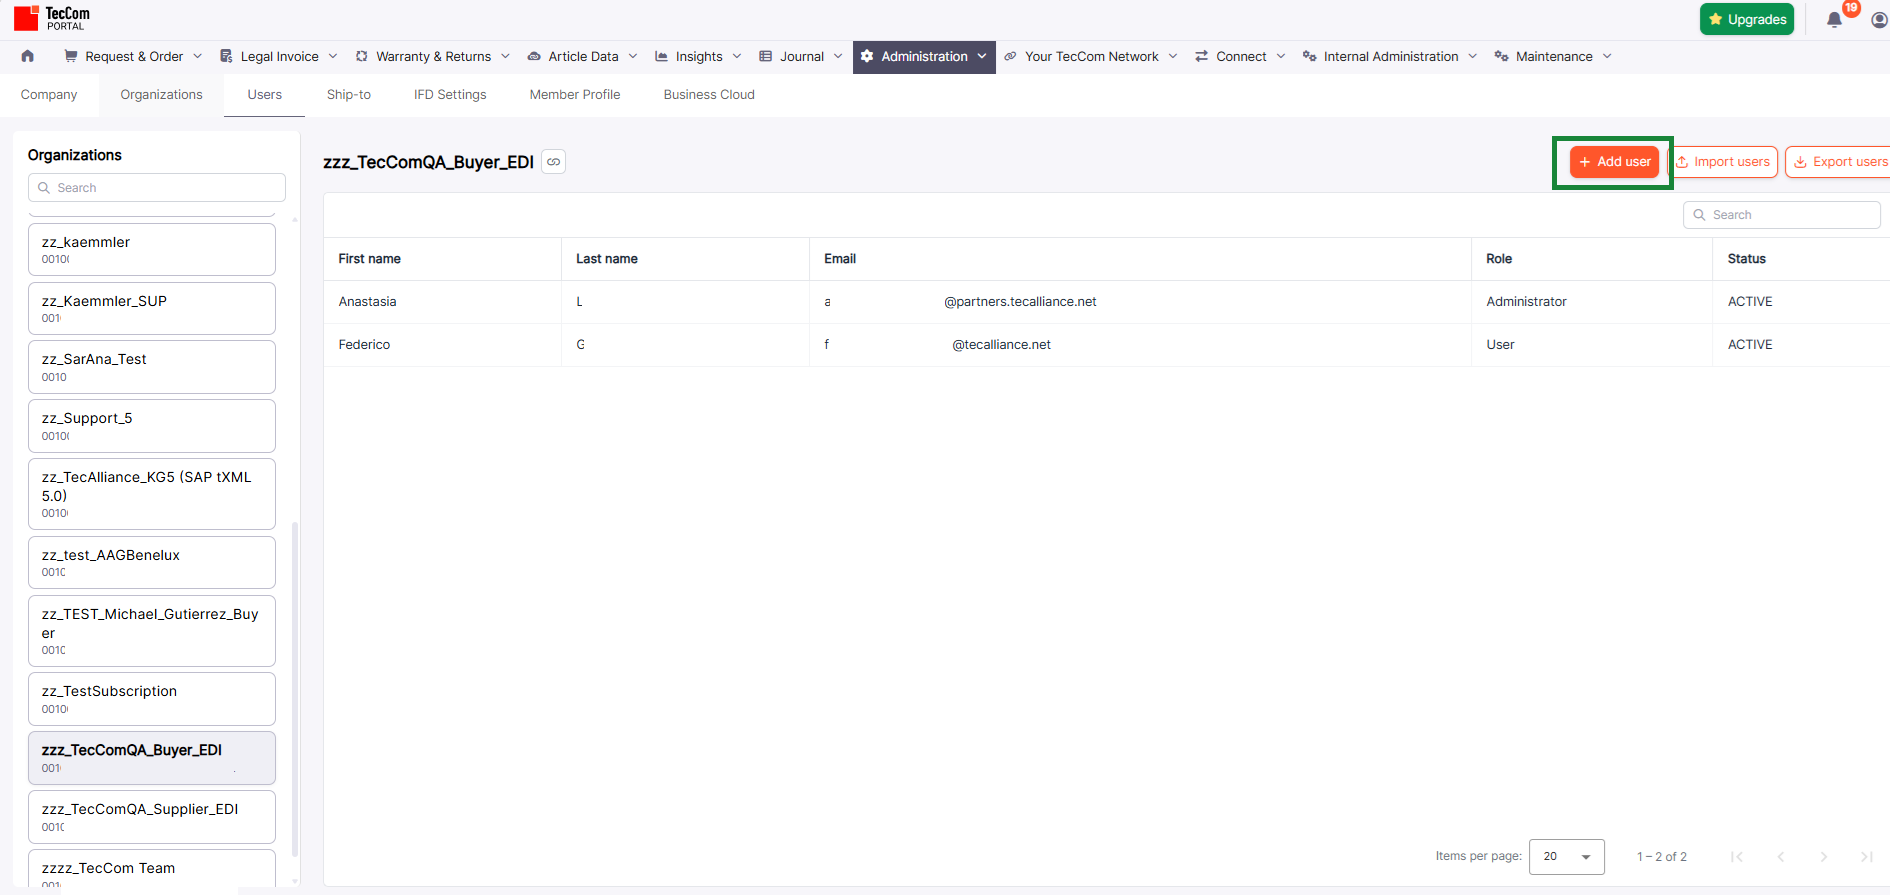
- Open the Users page and select the required organization from the organization list on the left side of the page.
- Click +Add user in the top-right corner of the page.
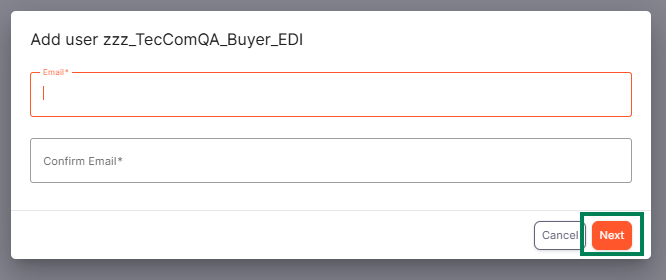
- In the Add user window, enter the Email address of the new user and repeat it in the Confirm Email field.
- Click Next.
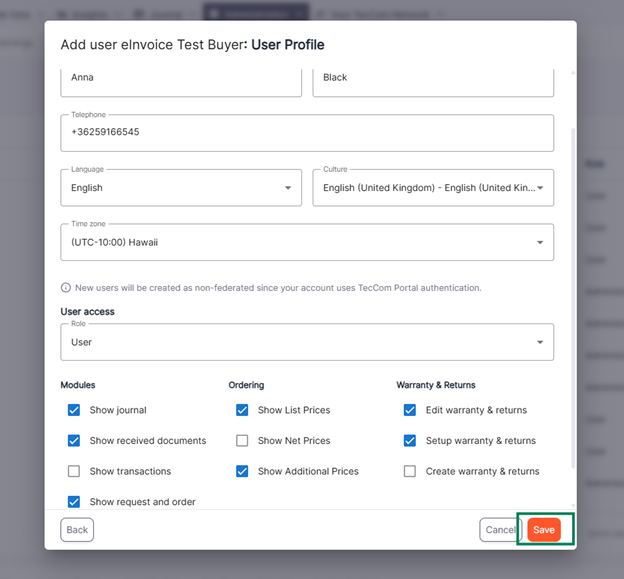
- On the User Profile step, enter the user’s personal data: First name, Last name, and Telephone.
- Select Language, Culture, and Time zone. These settings are used for correspondence, date and time formats, number formats, and time-related information in the portal.
- Depending on your own authentication type, new users will be created either as federated or non-federated users.
- If your account uses TecCom Portal authentication, new users will be created as non-federated users.
- If your account uses federated authentication, new users will be created as federated users.
This behavior is defined automatically and cannot be changed manually in the standard user creation flow.
- In the User access section, select the user role: Administrator or User.
- If the Administrator role is selected, all permissions are automatically granted.
- If the User role is selected, select the required permissions manually.
- If the User role is selected, choose the required permissions.
Permissions are grouped by functional area: Modules, Ordering, and Warranty & Returns.
Modules
- Show journal - allows the user to access the Journal menu.
- Show received documents - allows the user to read and download reverse messages.
- Show transactions - allows the user to access the Transactions list view.
- Show request and order - allows the user to access the Request & Order menu.
- Show e-Invoices - allows the user to access the e-Invoices page.
Ordering - Show List Prices - shows or hides gross price and gross amount in Product Detail and Order in OrderPro / Classic Basket and Document Hub / Journal.
- Show Net Prices - shows or hides net price, net amount, tax, and conditions in Product Detail and Order in OrderPro / Classic Basket and Document Hub / Journal.
- Show Additional Prices - shows or hides the additional prices table in Product Detail and Order in OrderPro / Classic Basket and Document Hub / Transactions.
Warranty & Returns - Edit warranty & returns - allows the user to edit claims in Warranty & Returns.
- Create warranty & returns - allows the user to create claims in Warranty & Returns, for example by adding or importing them.
- Setup warranty & returns - allows the user to set up claims in Warranty & Returns, for example copy, delete, or send claims.
- Click Save to create the user.
¶ Import users
The Import users function allows administrators to add multiple users to the selected organization at the same time by uploading a CSV file.
You can import up to 100 unique users per request.
To import users:
- Open the Users page and select the required organization from the organization list on the left side of the page.
- Click Import users in the top-right corner of the page.
- In the Import users window, review the import instructions.
The import file must meet the following requirements:
- Use the CSV template provided in the import window.
- A maximum of 100 unique users can be imported per request.
- Use ; as the delimiter in the CSV file.
- Email is required for new users.
- Email addresses of new users must be unique within the import file.
- If an email address already belongs to an existing user, a new user account will not be created. Instead, the existing user will be added to the selected organization.
- Available roles are User and Administrator.
- If no role is specified, or if the role value is invalid, the User role with all available privileges is used by default.
- Download the CSV template from the link in the import instructions.
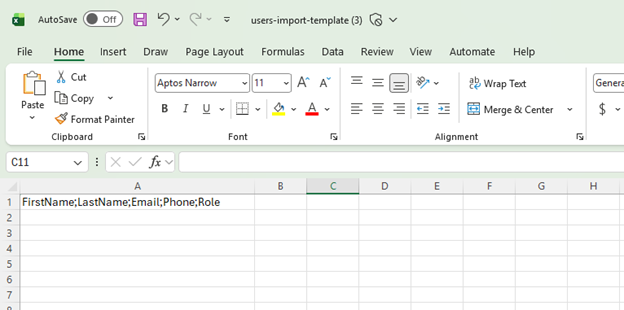
- Fill in the CSV file with the required user data.
- Upload the CSV file.
You can either drag the file into the upload area or browse for the file manually. - Click Next.
- Review the uploaded users on the Preview step.
You can use the search field to find a specific user in the preview list.
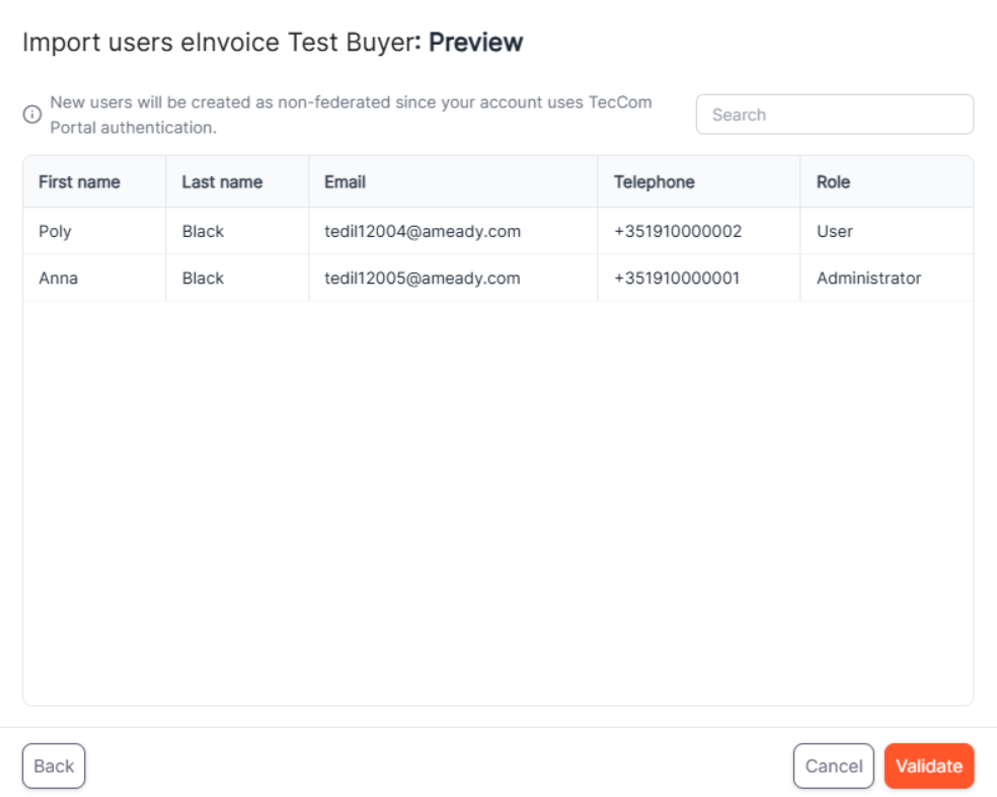
- Review the authentication information message.
Depending on your own authentication type, imported users will be created either as federated or non-federated users.
- If your account uses TecCom Portal authentication, imported users will be created as non-federated users.
- If your account uses federated authentication, imported users will be created as federated users.
This behavior is defined automatically and cannot be changed manually in the standard import flow.
- Click Validate.
- Review the Validation results.
The validation results are divided into the following tabs:
- New users - users who do not yet exist and can be created during the import.
- Existing users - users whose email addresses already exist in the system. These users will not be created again, but they can be added to the selected organization..
- Errored users - users who cannot be imported because their data contains validation errors.
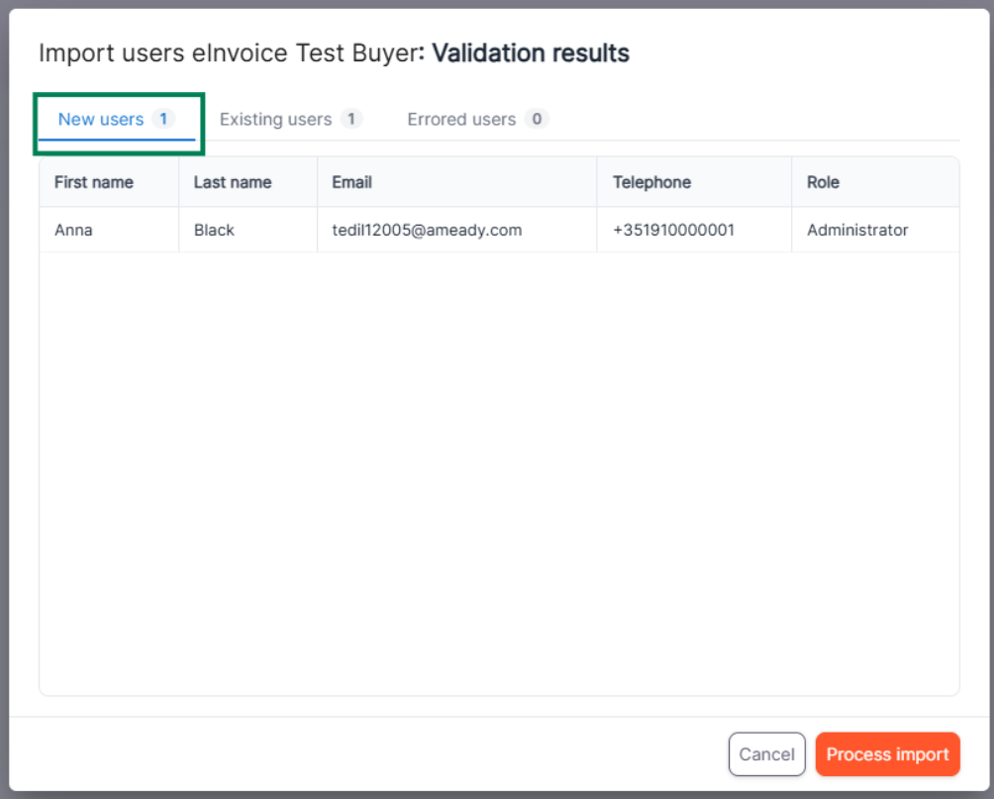
- If the validation results are correct, click Process import.
- Review the Import results.
The import results show:
- Total requested - the total number of users included in the import request.
- Total successful - the number of users imported successfully.
- Total failed - the number of users that were not imported.
The result table also shows the import status for each user.
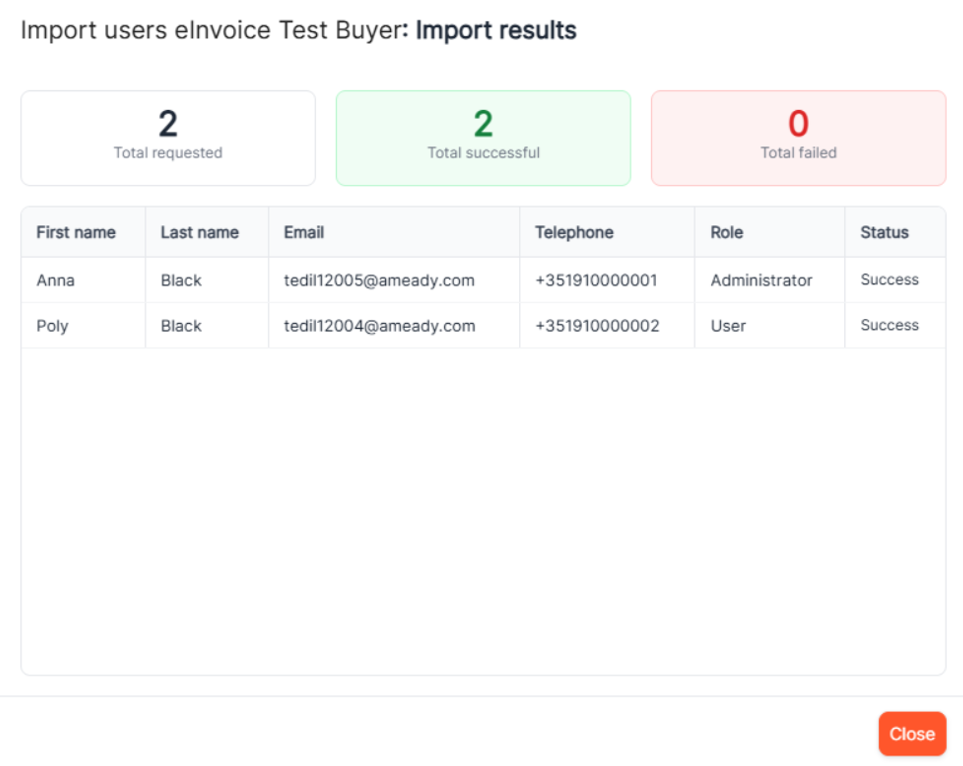
- Click Close to finish the import process.
¶ Possible import errors
During the import process, the system validates the uploaded CSV file. If the file contains invalid data, the import cannot continue until the errors are fixed.
Possible validation errors include:
- Email is empty — the email field is required and cannot be empty. Add a valid email address for the user.
- First name exceeds 50 characters — the first name is longer than the allowed limit. Shorten the first name to 50 characters or fewer.
- Last name exceeds 50 characters — the last name is longer than the allowed limit. Shorten the last name to 50 characters or fewer.
- Email exceeds 254 characters — the email address is longer than the allowed limit. Use an email address with 254 characters or fewer.
- Telephone exceeds 25 characters — the telephone number is longer than the allowed limit. Shorten the telephone number to 25 characters or fewer.
If the CSV file contains an unsupported role, for example Manager, the role is automatically replaced with User.
Only the following roles are supported: User and Administrator.

Note: The list of other organizations shows only organizations where you have an administrator role. It does not necessarily show all organizations the user belongs to.
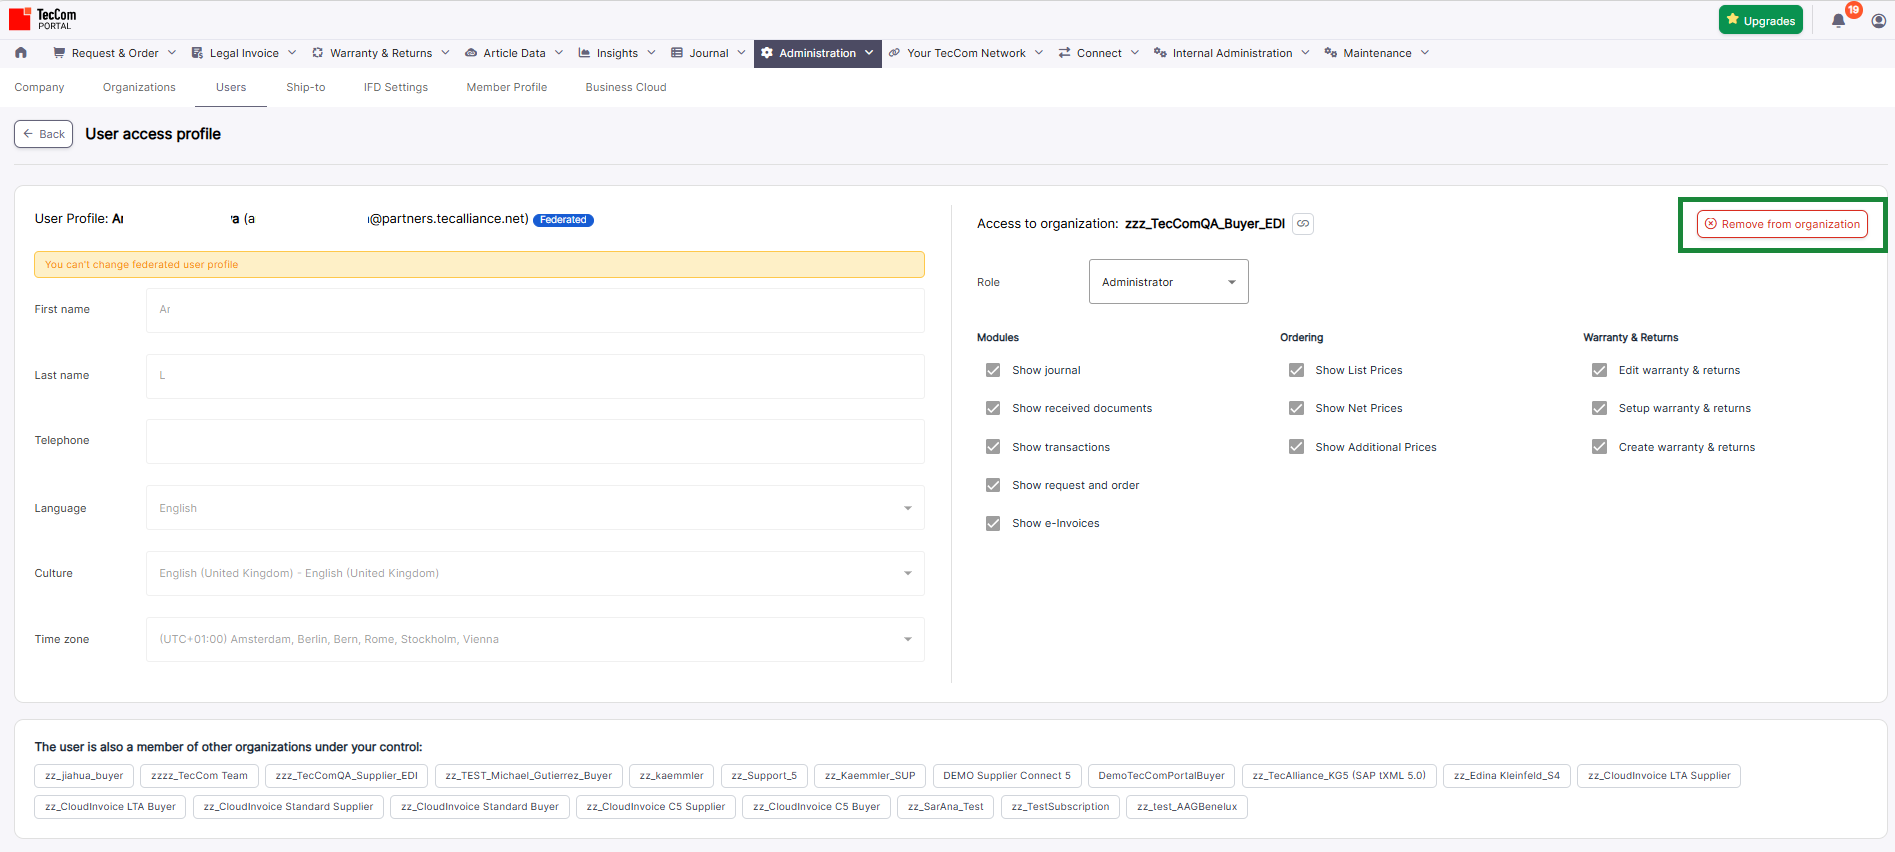
¶ User access profile
An administrator can open the User access profile page by clicking a user in the Users list.
The User access profile page provides detailed information about the selected user and their access to the selected organization.
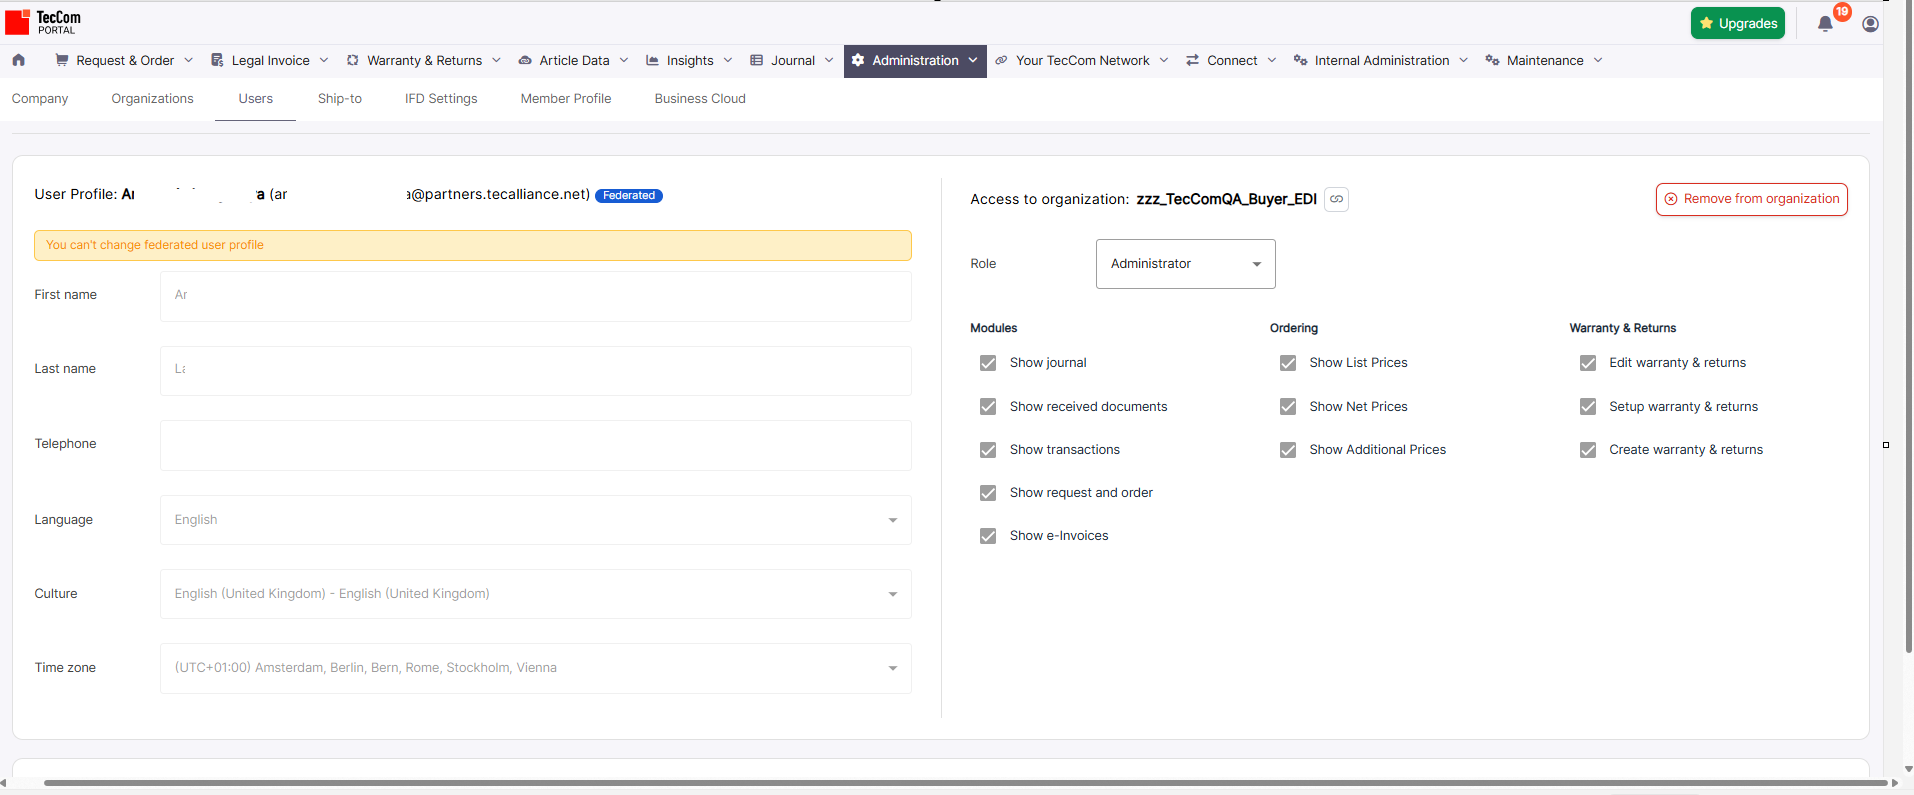
On this page, an administrator can:
- View and update the user’s personal data (First name, Last name,Telephone)
- View and update the user’s regional settings ( Language, Culture,Time zone)
- View the organization for which the user access profile is currently displayed.
- Update the user’s role in the selected organization.
- View and update user permissions for the selected organization.
- Remove the user from the selected organization by clicking Remove from organization.
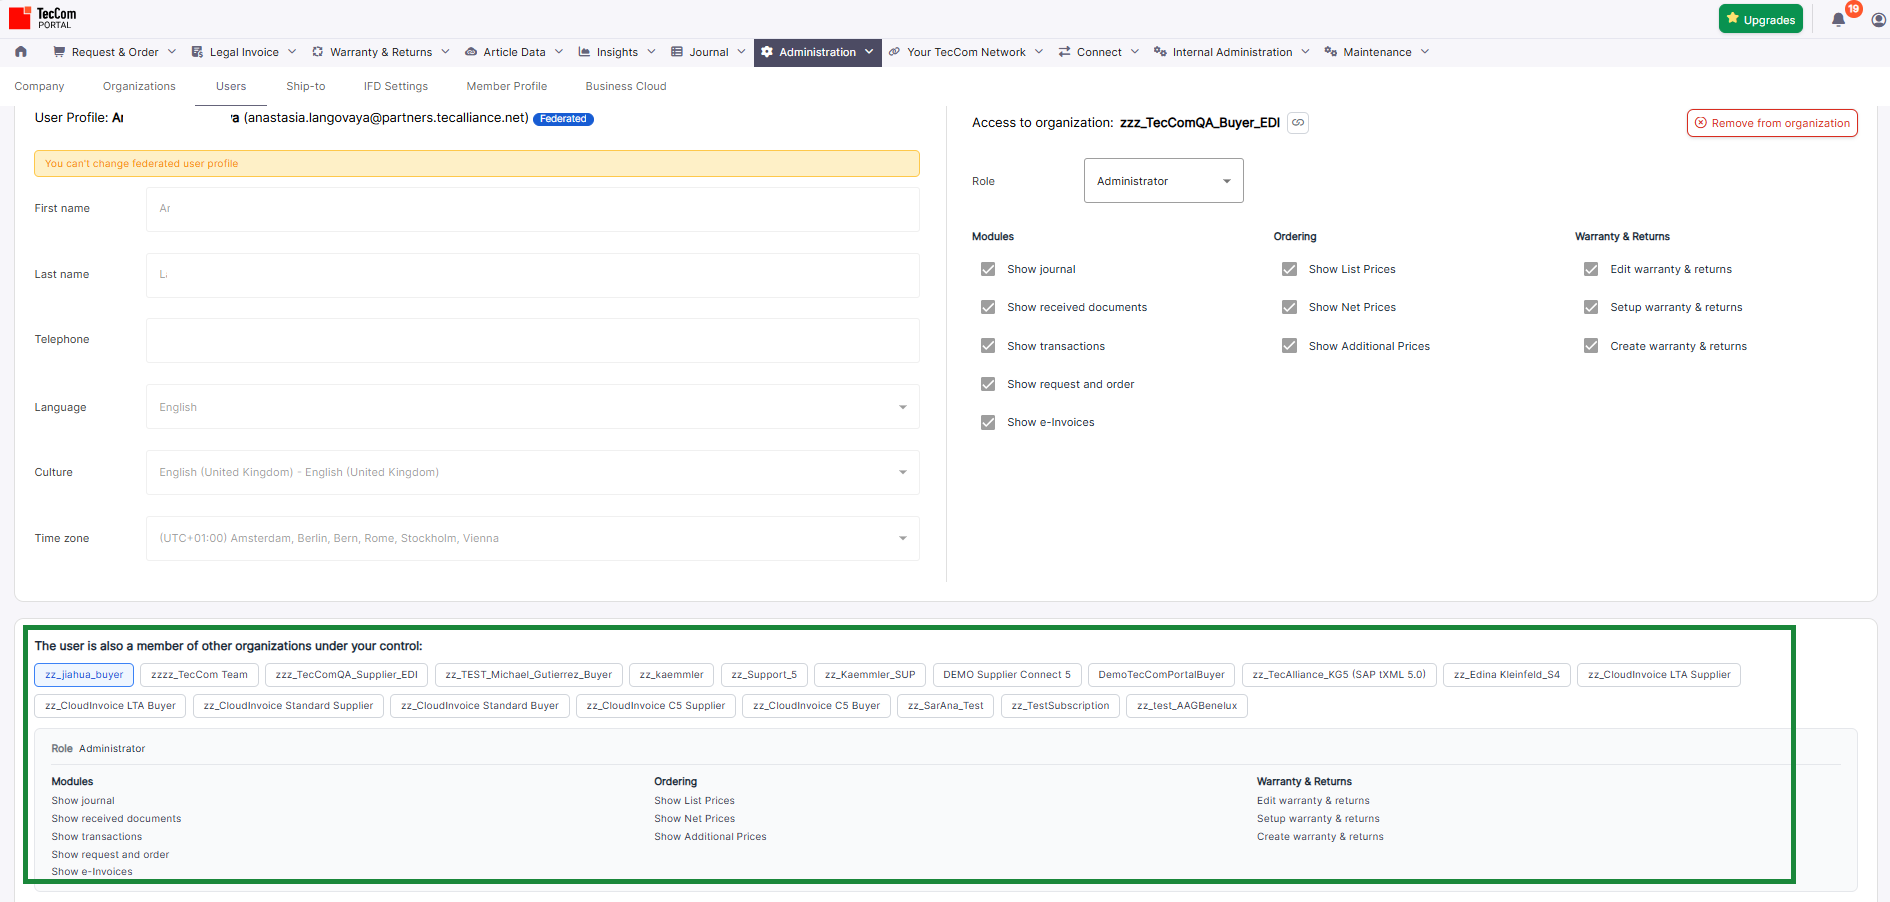
- View other organizations where the user is also a member and where you have an administrator role.
Organizations where the user is also a member are displayed at the bottom of the page. Selecting an organization from this list shows the user’s role and permissions for that organization.
After making changes to the user profile, role, or permissions, click Save to apply the changes.
Note: The list of other organizations shows only organizations where you have an administrator role. It does not necessarily show all organizations the user belongs to.
¶ Remove a user from an organization
An administrator can remove a user’s access from an organization where they have an administrator role.
To remove a user from an organization:
- Open the Users page.
- Select the required organization from the organization list on the left side of the page.
- Click the required user in the user list.The User access profile page opens.
- Click Remove from organization in the Access to organization section.
- Confirm the action in the confirmation window.
- Click Yes to remove the user from the organization.
- Click No to cancel the action.
After the user is removed, they will no longer have access to this organization.
¶ How Users setting affects to the OrderPro
¶ Price permissions
An organization's admin can control access to product prices and amount in an order through price permissions in the image below:
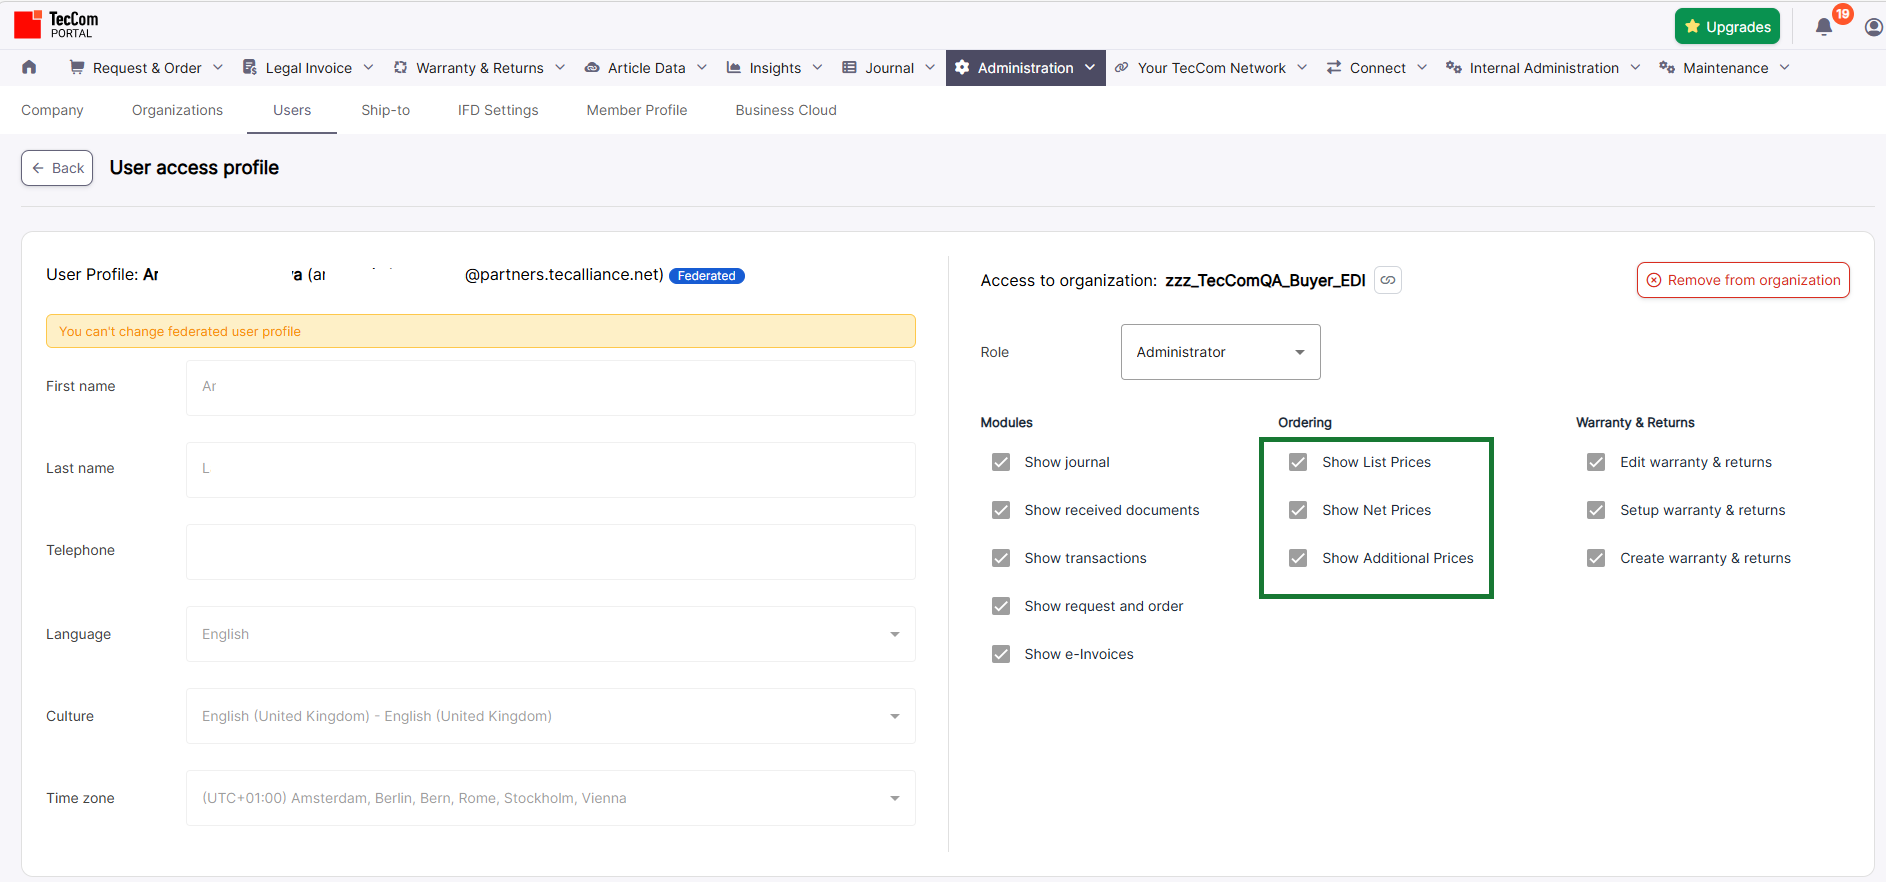
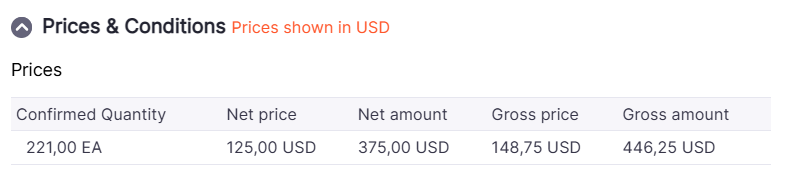
- Show List Prices: show/hide gross price and gross amount of products in an order
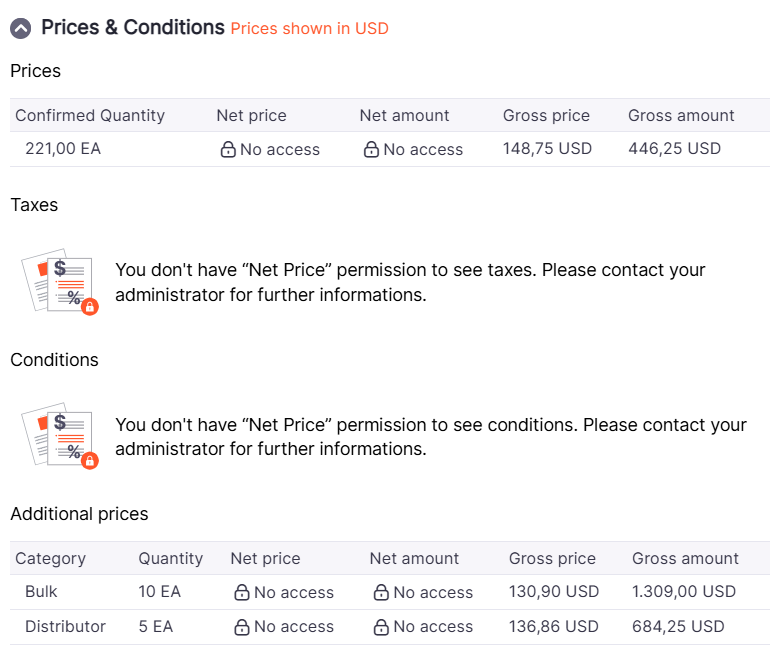
- Show Net Prices: show/hide net price and net amount of products in an order
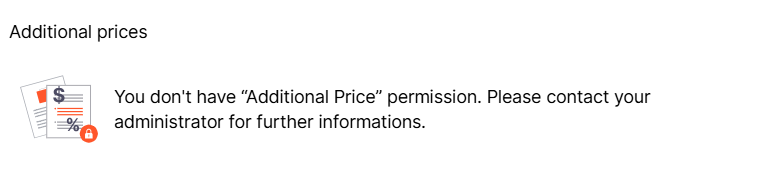
- Show Additional Prices: show/hide additional prices table
To see where these permissions are applied in OrderPro, open an order in OrderPro, hover on the first column of any row in the Product Table and click on the Details button then scroll up & down to find Prices & Conditions and Additional Prices headers.
You can configurate price visibility for each user in Order Pro.
Below are some images as examples: